Finally, itís time to tell you all something about Hex Editing. First of all I want to warn you, all the things Iím going to tell you I have found out my self or with help from others, there was no guide to explain what we needed to do so maybe some things could have negative side effects or donít work in other versions of rct2 Ö
What is Hex-Editing ?
Hex editing is editing of the Memory of the game.
Before you can understand what hex editing is you first need to understand how rct2 works.
In rct2 we have some different kinds of files, these work together to make the game in combination with the memory.
We have the following kind of files:
---
cssXX.dat
The css files have some data for rct2, like music. Most of the css files have music in them (you can play these .dat files in mediaplayer). Some other have other things in them which manage the styleís of rct2.
g1.dat
This is the Graphic Users Interface (a.k.a GUI) file of rct2. It contains all the ďhard codedĒ images of rct2 and all the graphic images. if you open the GUI file with the RCT2GUIeditor you can see al those images. here is a little index of the first part of the GUI file.
0 - 3042 - LANDTILES
3042 - 3122 - IMAGES FOR RIDE CONTRUCTION
3122 - 3861 - SUPPORT
4915 - 5047 - COLOR PALETTE
5047 - 6408 - PICTOGRAMS
6409 - 11260 - PEEPS
11261 - 11440 - HANDYMAN
11441 - 11880 - MECHANIC
11880 - 11972 - GUARD
11972 - 12128 - PANDA
12128 - 12324 - TIGER
12324 - 12544 - ELEPHANT
12544 - 12676 - GORILLA
12676 - 12892 - SNOWMAN
12892 - 13104 - KNIGHT
13104 - 13376 - BANDIT
13376 - 13608 - PIRATE
13608 - 13764 - SHERIFF
13764 - 13896 - ASTRONAUT
13896 - 14184 - ROMAN
After this there are the track elements, the first coaster track (looping coaster) starts at 15004
XXXXXXXX.dat
The object and rides files are a very large part of rct2, in these files the data and the images of the objects and ride cars is stored. As you probably know you can edit these files with the ridemaker and object editor and landmark maker.
rct2.exe
The rct2.exe file is the engine which put everything together, it takes the data from all the other things and makes a image of it, it also recognise which keys you press and adjust the data in the memory so it can make a new image.
---
So that are all kinds of files rct2 use, they work together with the memory to create the things you see on your screen.
For example we take the red fir tree.
In the program rct2.exe we give the commando to build an object. Rct2.exe looks in the loaded savegame file to see which objects are used in this game and shows them in the menu.
We click build the object and rct2.exe edits the mapdata in the memory so there is a red fir tree in it on the right square. If we now save the game that mapdata will be transferred to the savegame file so the red fir tree is stored in there to.
To show the image of the red fir tree rct2.exe looks in the memory wich .dat file he must link to the object and loads that object file, than he can put the image of the red fir tree in it. In the memory is coded which direction the tree faces so rct2.exe knows which image to take.
If we are going to hex edit we take the string which describes this red fir tree and edit this string.
How does Hex Edit works
To enable hex editing we first need a program that allows us to edit the memory. You can use every program you like but I uses Winhack.
The interface of winhack isnít that complex.
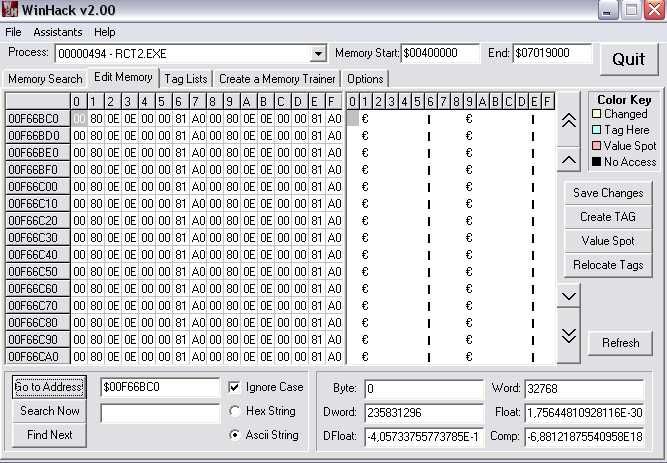
In the left part you see the hex numbers of the memory and in the right part you see the Ascii variables.
In the top you can chose the process you want to edit and in the bottom of the program you have a search function to search in the memory.
In the screen you see a part of the mapdata which is empty, this are a few landtiles on normal height from grass.
If you look good you see that every 8 blocks a new string starts, so on every row there are two land tiles. If we go to some more advanced hex editing you must always remember that every object which is on 1 tiles uses 8 blocks. If it is on more tiles it uses more but it is spread out.
So now we take a closer look that the red fir tree again. First we need to find this object. There are many ways to find the object you want. I prefer to do it with the landtiles. If you make the piece of land on which the object is place unique you can find it if you know the codes. So first we need to know how the land tiles works.
If we take a closer look at the land tile we see this string:

Now I shall explain what these numbers mean:
1: This number is the view, by changing this number you can make the tile give a underground view etc.
2: Iím not sure what this mean, but I think it means if there is something build on the tile or not.
3: The height of the land tile
4: The height of the side of the land
5: This changes the shape of the land.
6: This changes the type of land, here is a list of every type of land and the variable it uses, some land types requires an other view (this is because some of the land need to cross the border of the tile and some not, I think):
view=00
00 = grass
20 = sand
40 = dirt
60 = rock
80 = red rock
A0 = tan dirt
C0 = grass/dirt
E0 = ice
View=01
00 = red grid
20 = yellow grid
40 = purple grid
60 = green grid
80 = red clay
A0 = checker
7: This manage the diffrend states in which the land tile can be (like mowed or not).
8: This manage if you own the land and if there is a border etc.
---
So now we know how the land tile is constructed we can find every tile on the map if we know how it looks.
To find the red fir tree I have given the land the red rock ground so I can find it.
I use the search option of winhack to find that landtile:

Now we find the red fir tree:

First you see the code of the land tile and after that there is the code of the red fir tree. All objects on a tile are behind the tile you see now.
At the moment I canít explain the code of the red fir tree completely but the things I do know are this:
---
1: in combination with number 2 this defines that it is a red fir tree
2: in combination with number 1 this defines that it is a red fir tree
3: this is the height on which the object is place
4: this is the height of the clearance
5: I donít know yet
6: I donít know yet
7: I donít know yet
8: I donít know yet
---
So what now?
Now we know the basics of Hex-Editing, now we can look to some ways to use this.
Iím now going to explain some hacks that are only possible with hex-editing:
Make every type of track invisible
This hack is just a rip off out of the Codex topic, the FF method used in LL can also be used in rct2.
First we make a track:
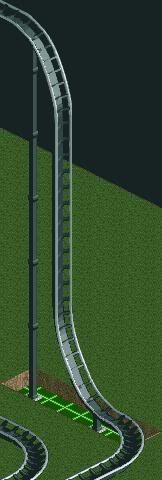
After that we put objects under it.

Now we search the tiles that have the objects on it:
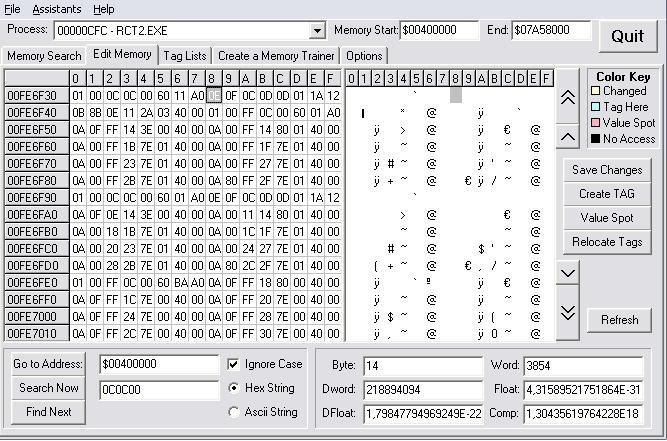
We take the first block of the object (the selected in this screen):
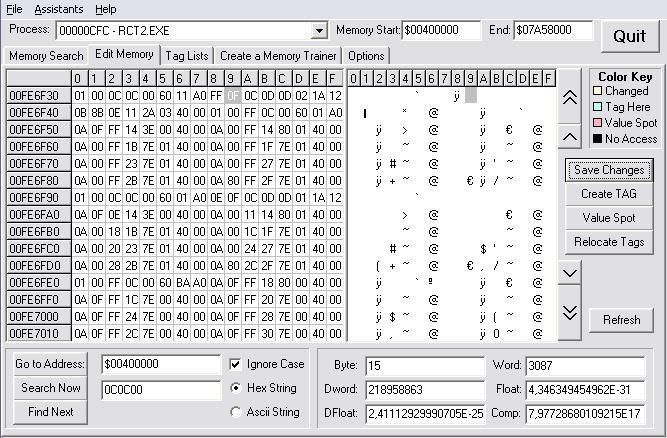
And we change this block to FF.
We do this also on the other land tiles.
After that we go back to rct2 and we see:
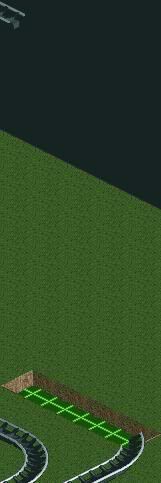
And you will see that trains still can travel over it:
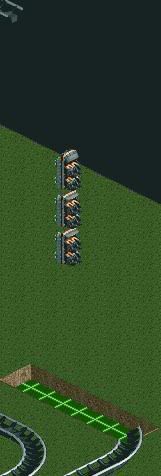
The theory behind this hack is that by changing the first block of a object to FF it becomes deleted, normally it would be moved to the last place of the mapdata but because you edit it now it stays in front of the other things so all things behind it looks removed to but arenít. .
The only letdown of this hack is that you can build anything above this object anymore but there are wayís to conquer this problem also. For example you can build the track first a lot higher and move the object up. Now use the FF method and after that lower the track by hex-editing or by using a alternate colorscheme. Now you are able to build objects on the same height as the track.
Fix a Black hole
A black hole glitch sometimes comes in a park. This error is very tricky, what happens is that the mapdata of the landtile is changed into something else, in this way rct2 misses a landtile and that cause the black hole.
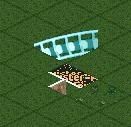
You can fix the black hole in this way:
First we build a landtile we can track next to the blackhole:
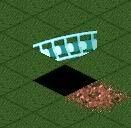
We search for the landtile, this is what I find:

You see that after the landtile there are two objects but ingame we donít see any objects, so we will change those two objects in landtiles again:

In this way we recovered the landtile that was missing, the other thing will be removed later by the game so you can use it again.
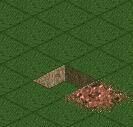
And this is how it looks ingame.
Thanks to faceman for providing the black hole
Make a vertical Lift
Now we start on the real track hacking. Till now we only used object and land tiles, now we are also going to change the track pieces.
First letís examine the track piece code:
http://i2.photobucke...EX/HEXvert5.gif
--
1: This is the direction of the track and or is has a lift or not, if the first number is a 0 the track has no lift and if it is a 8 it has a lift. The second number is the direction of the track.
2: This defines it is a track
3: The height of the track
4: The clearance height of the track
5: This defines which track element it is Iím still working on a complete list of this
6: If you track is a brake in this block the brake speed is defined, and for multi tile element is says which piece of the element it is.
7: donít know yet
8: This is the track ID
--
So now we know how the track piece is made we can make a vertical lift because we know where the lift is coded.
So we build a coaster.
http://i2.photobucke...EX/HEXvert1.jpg
And go to winhack and search the land tiles where the vertical lift needs to be.
http://i2.photobucke...EX/HEXvert2.jpg
The green blocks are the land tiles and the other things are the track elements.
To make the vertical lift we change al those first numbers in a 8:
http://i2.photobucke...EX/HEXvert3.jpg
if we now go back to rct2 we will find that the track goes up the vertical piece:
http://i2.photobucke...EX/HEXvert4.jpg
So weíve got ourself a vertical lift.
An X-car coaster
This hack is the same hack as the Vertical lift only now we donít take a vertical piece of track but a half looping.
We will get this as result:
http://i2.photobucke...EXxcoaster1.jpg
To get this we first build the coaster and search the land tiles again in winhack.
No we change the first numbers in a 8 again like you see here:
http://i2.photobucke...EXxcoaster2.jpg
And weíve got ourself an X-car coaster.
Working Duel Station
This is a hack that many people wanted for a long time already. We know that it is possible in rct LL so it must be possible in rct2. Well here you have the way how it must be done:
The duel station will actually be 2 track above each other with the car lowered, so first we make the first track:
http://i2.photobucke...EX/HEXduel1.jpg
Now we need to raise this track 1 clearence, if we raise this track with the edit ride screen we raise it 2 clearence so we could do it all with winhack. But there is another way to, we can also raise it with Object Manipulation. So first we make sure that object manipulation can recognise the track by place an landtype under it we havenít used somewhere else.
http://i2.photobucke...EX/HEXduel2.jpg
Now we go to object manipulation and raise the track 1 clearence.
http://i2.photobucke...EX/HEXduel3.jpg
After this we need the second track to, because this track needs to be at normal height we could build it trought the other with zero clearance on, but this could cause white glitches so I prefer to build it above the other track and lower it with the edit ride screen. But as we know the edit ride screen donít raise the station so we need to build that in later.
You may have also noticed that with the object manipulation the station also didnít raise, this is a bug in the 8-cars trainer why we need winhack.
Here you see the track above the other track:
http://i2.photobucke...EX/HEXduel4.jpg
Now we lower it with the edit ride, and we build the station:
http://i2.photobucke...EX/HEXduel5.jpg
And here you see the result:
http://i2.photobucke...EX/HEXduel6.jpg
You see that I also give the land under that station an other ground type, this is so I can find it in winhack now, because I still need to raise that other station 1 clearence. So I go to winhack and search the tiles:
http://i2.photobucke...EX/HEXduel7.jpg
We need to raise the track elements 1 clearence so we take there height and raise it with 1. we could also raise the clearance height of this track element to but it doesnít matter if you do it or not.
http://i2.photobucke...EX/HEXduel8.jpg
I prefer to raise the exit of the ride to but you could also let the entrance at this height, you could also chose for lowering the ride entrance (or donít raise that one with the object manipulation if possible).
If you do want to raise the exit you need to make sure that you take that one to so search the memory with ďFind NextĒ so you find the exit also:
http://i2.photobucke...EX/HEXduel9.jpg
Now weíve got this:
http://i2.photobucke...X/HEXduel10.jpg
Both rides can now be tested but 1 is still 1 clearence higher. We can solve this problem by putting the tracktype on ďShop (All types)Ē , but before we do this we first need to put the ride to test because a shop canít be tested, so now you need to make all the adjustments to the ride that you want (like color of the train and the waiting time etc).
So after you put it to test you can change the track type to shop all types:
http://i2.photobucke...X/HEXduel11.jpg
After this you only need to build a new station and s curve at the place of the old ones because the went invisible.
I have build the station in opposite direction to make the change of errors minimal but there are also ways in which you can get the station in the other way (you need to think them up by your self by now).
http://i2.photobucke...X/HEXduel12.jpg
And weíve got our self the Working Duel station now.
The End
Now this is my gift to the community for now, I hope you guys like these tuts and I hope this solves some problems
I will try to update these tutís with new things or improvements, and if somebody has comments please say it.
Great thanks to the majesty members and rctrevalutions for checking the tuts for errors.
Also thanks to some of the members of this site for supporting me with this.
And thanks to kumba for staying this site alive.


