Jump to content


Photo

Compact Inverted Tutorial


  • Please log in to reply
19 replies to this topic

#1 Ultratycoon

Ultratycoon

    4x Monthly Competion Winner / Former RCT Majesty Leader

  • Members
  • PipPipPipPipPipPipPip
  • 2404 posts
  • Location:Providence, RI, USA
  • Interests:ultimate frisbee, skateboarding, playing the flute, singing, poker, astronomy, ping pong, sand volleyball, physics
  • Coaster Uploads:8


Users Awards

Posted 06 February 2006 - 01:51 PM

Compact Inverted Coaster Tutorial
Website Version

Step 1: Placing the station
The first thing you have to do is find a good spot for the station. You want a place that will allow you make a good station building around it. You might also want to consider how the coaster will be finishing. Will the surroundings near your coaster make it difficult to make a track that returns to the station?

I placed mine at the bottom of a mountain leaving the plenty of space behind and around the station. Image


Step 2: The lift hill
The height of the lift hill should be relative to how big you want your coaster to be. A high lift hill with a short track will give you a fast coaster (Great for thrill machines). A short lift hill with a long track will give you a rather slow coaster (Great for adventure rides). A short lift hill with a short track will give you a slow, mild coaster (Great for kiddie rides). A high lift hill with a long track will probably be very intense especially on a compact inverted coaster. Try to avoid using that.

Mine is 100 feet high and goes to the peak of the mountain. Image


Step 3: The first drops
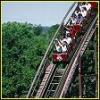
As a good rule of thumb, the first drop should be big. You have to get the train off the lift hill and you want it to be as thrilling as possible. There are many ways to make a first drop. You can make a simple one like Goliath's, a twisted one like Batman's, or even a vertical one like Oblivion's (well a vertical drop isn't possible on a compact inverted coaster but you get the point).

I made a twisted drop and followed it with a hill going over another peak of the mountain. Image


Step 4: Laying the track
This is the longest and most difficult part of designing a coaster. It's such an open-ended part of coaster building that the only way to really become good at it is experimenting yourself and observing other's designs. There are some useful tips specifically for compact inverted coasters.
One: Don't use too many inversions. Inversions while they add excitement also add intensity. A four thousand foot coaster shouldn't have more than six inversions. I used only one inversion in my coaster. Image
Two: Use a lot of different elements besides inversions. Here's a few I used: a helix, a swooping drop, and back-to-back helixes. I'm surprised that the back-to-back helixes element is not very common. I think it can really add beauty to coasters, especially inverted types.
Three: You should try to make it interact with the evironment. Near misses at high speeds are the best. Terrain hugging coasters can also look very good. The land is always your friend when it comes to making coasters. Tunnels are also very good for creating excitement. A lot of short tunnels are better than a few long tunnels. Here's one such place on my coaster. Just after a high turn and a steep drop, the train rushes past sharp rocks on both the left and right side and then into a short tunnel.Image


Step 5: Reconnecting to the station
When reconnecting the track to the station it's important to make it look like it flows. Avoid using s-bends here, they can make your coaster look sloppy. If you started the coaster with plenty of space behind the station this should not be a problem. Don't forget to use brakes to slow the coaster before making sharp or unbanked turns. Using block brakes is always a good idea and it makes coasters more realistic. You might have to do some train sychronizing to make sure the trains don't stop at the top of the lift hill while they're waiting for the other train to make it past the next block section.

Here's my brake run. Notice how well the track just flows and isn't forced or sloppy.Image


Step 6: Statistics and tweaking
After testing your coaster and making sure it gets through the entire circuit, check the ride stats. Make sure intensity and nausea are not too high and excitement not too low. Usually there's not a problem with intensity and nausea being too low, in fact the lower the better. But if they're too high there can be several reasons for it. First of all, inverted coasters are always going to be more intense than sit-down coasters. It's just the way it is. Another reason could be track length. Once tracks start getting up to 4500 feet or longer intensity goes up and excitement quickly goes down. Too many inversions also cause high intensity. High g-forces can really bring intensity up. To avoid this try not going through inversions too fast and bank fast turns. You might have "tweak" the track to fix these problems, that is make small changes to the track but not changing the overall basic layout.

Here are the statistics of my coaster. Image


Step 7: Coaster add-ons
Making the layout is only half of a coaster. The second half is adding everyting around. This is mostly in the form of scenery but there are some other things too. The most obvious thing is of course the queue line. You should attempt to make the queue line follow somewhat close to the coaster itself. That way those people standing in line can see the ride and get their hearts pounding before riding the actual coaster. Of course make the line connect back to the main footpaths.

Here's the two pieces of the queue line on my coaster. Image Image

You can also and should make a building around the station. Buildings are on almost every coaster in the world so doing so just makes your coaster that much more realistic. Try to include a platform next to the station track and make sure you can see inside the building at least a little bit. Don't forget to cover the entrance and exit buildings.

In addition to a the station I added what's called a transfer station. This is used in reall life to transfer trains on and off the track so that they don't wear down so fast (In RCT2 it doesn't really work but it looks nice). I made sure that I used similar scenery on both the normal and transfer stations. Image

Finally, add in scenery around the coaster's track. This cannot be emphasized enough. There is no such thing as a good coaster without scenery in RCT2. Use trees, bushes, buildings, other tracks, water, fountains, waterfalls, anything. This is especially important with adventure rides or slow rides because obviously the speed isn't giving the ride much excitement.

Here's an overview of my coaster with scenery added in. I used custom supports, trees, and shrubs. This also shows a part of the rest of my park. Image


Thankyou for reading this tutorial and I hope it has been helpful. If you would like to download this park you can do so from this page.

**website version added-mf59**

Edited by marinersfan59, 12 February 2006 - 09:37 PM.


#2 coastercrazy

coastercrazy

    2008 Valentines Contest RunnerUp

  • Moderator
  • PipPipPipPipPipPipPip
  • 1688 posts
  • Gender:Male
  • Location:California
  • Interests:RCT, duhh.:-P

Posted 06 February 2006 - 07:56 PM

Very useful tutorial Ultratycoon. :thumbs:

It's very easy to understand too. :D

/CC

#3 Emergo

Emergo

    April05 VP/05+06 Rd Rally Champ/Winner Cell Contest 2006

  • Senior Staff
  • PipPipPipPipPipPipPipPip
  • 3361 posts
  • Location:The Netherlands, Europe


Users Awards

Posted 07 February 2006 - 02:49 AM

Great and very clear/well written/well illustrated tutorial, Ultra :thumbs:

Thanks :D

#4 coastercrew

coastercrew

    Coaster Designer

  • Members
  • PipPipPipPip
  • 205 posts
  • Location:Cedar Park, TX
  • Interests:Skiing, swimming, soccer, hiking, biking.

Posted 07 February 2006 - 07:30 AM

Ultra,

Excellent tutorial. :thumbs: I really enjoyed reading it. Probably the best one I've read. You described all the elements to a good coaster in a very logical manner with great illustrations.

And I learned something new, the swooping drop. I never knew about this element. Thanks :) I'll have to try it the next time I make a compact inverted.

I disagree with one point that you made though....

There is no such thing as a good coaster without scenery in RCT2

Actually, a good coaster design is a good coaster design regardless of scenery. Yes, scenery adds to and enhances a coaster, but a good coaster design does not need scenery, even in RCT2. I've seen a lot of OK coaster designs that appear to be good because of the scenery in RCT2. You take away the scenery and it's just OK. ;)

#5 Levis

Levis

    RCT Majesty Club Leader

  • Moderator
  • PipPipPipPipPipPipPip
  • 1109 posts
  • Gender:Male
  • Location:Twisk


Users Awards

Posted 07 February 2006 - 10:12 AM

thanks agains ultra ;) .

#6 Todd Lee

Todd Lee

    May 2007 V.P. Winner

  • Senior Staff
  • PipPipPipPipPipPipPipPip
  • 3448 posts
  • Gender:Male
  • Location:Utah, U.S.A.


Users Awards

Posted 07 February 2006 - 08:38 PM

I agree, with everyone here, excellent tutorial Ultra! Very nicely put together, with a great finished product to boot!

I really like the custom supports you've got around the helixes. Feel free to send me a tutorial on how to do them! ;)

Ultra,
Actually, a good coaster design is a good coaster design regardless of scenery. Yes, scenery adds to and enhances a coaster, but a good coaster design does not need scenery, even in RCT2. I've seen a lot of OK coaster designs that appear to be good because of the scenery in RCT2. You take away the scenery and it's just OK. ;)


I see what your saying here. It's like eating a good hamburger. If it's really good, you can get the patty off the grill, and just eat it plain. But if your looking for the best experience possible, you don't stop there. You get the freshest tomatoe, lettuce, bun, pickles, mayo/mustard/ketchup and let's not forget the cheese! Now you don't just have a good hamburger, you have an awesome hamburger! (and yes, I purposely forgot the onion... tastes good, but forget having people hang around you for the rest of the day)

Oh, and before anybody says it, there is such a thing as spoiling a good thing with too many fixin's. That's certainly not done here with this tutorial though. :thumbs:

#7 coastercrew

coastercrew

    Coaster Designer

  • Members
  • PipPipPipPip
  • 205 posts
  • Location:Cedar Park, TX
  • Interests:Skiing, swimming, soccer, hiking, biking.

Posted 07 February 2006 - 08:48 PM

I really like the custom supports you've got around the helixes. Feel free to send me a tutorial on how to do them! ;)

I second that proposal; a tutorial on how to do custom supports! Thanks :)

#8 coastercrew

coastercrew

    Coaster Designer

  • Members
  • PipPipPipPip
  • 205 posts
  • Location:Cedar Park, TX
  • Interests:Skiing, swimming, soccer, hiking, biking.

Posted 08 February 2006 - 06:08 AM

Actually, a good coaster design is a good coaster design regardless of scenery. Yes, scenery adds to and enhances a coaster, but a good coaster design does not need scenery, even in RCT2. I've seen a lot of OK coaster designs that appear to be good because of the scenery in RCT2. You take away the scenery and it's just OK.

I just thought that my point above might be helpful with an excellent real world example.....

Take two of the top woodies in the world (tops in terms of specs), the Rattler at Six Flags Fiesta Texas and the Texas Giant at Six Flags Over Texas.

Here are the specs with world rankings for woodies:

+----------+----------------+---------------+
| Coaster_ | ____Rattler___ | _Texas Giant_ |
+----------+----------------+---------------+
| Speed___ | 65 mph - 5th__ | 62.1 mph - 9th|
| Height__ | 179'7" - 3rd__ | _143' - 5th__ |
| Drop____ | __124 feet *__ | 137 ft - 9th_ |
| Length__ | __5080 - 7th__ | __4920 - 9th_ |
| Time____ | ______2:26____ | _____2:00____ |
| Max Angle| ____61.4%_____ | _____53.0%___ |
| Layout__ | ___terrain____ | ___compact___ |
+----------+----------------+---------------+


* - The Rattler's drop used to be 166 feet which was 2nd in the world.
% = degrees

I just moved to Texas 2 years ago and decided this past summer to buy a season pass to Six Flags. Since I live right in the middle of Astroworld, Over Texas, and Fiesta Texas what a better way to sample the rides.

Anyway, the Texas Giant is a compact coaster, meaning that it folds into itself, as the track decends it uses the same supports, so sometimes you have track below or above you. There is no direct scenery to catch your eye as you go whizzing around the track, just supports and other track over head.

From the top of the lift hill, there are 3 or 4 good size drops with banked turns at the tops before reaching the block brakes at about the middle of the ride. You have a moment to say wow and collect yourself when all of a sudden, the track drops out and the train dives and banks off a steep decline and you off to the races again. The last part of the track hugs the outside of the support system all the way around entire circumference with fast short hills that make you feel like you're going to land in the car ahead of you, then suddenly get lifted back up. When you get off, you're heart is pounding and you're like wow that was awesome :woot: as you quicky gather up the gang for another ride.

You can see the block section in the first photo; it's the flat section high above on the far right; and the sudden steep drop behind it.

Now the Rattler is built in an old abandon quarry. Somewhat similar to Ultra's Atlas Rivers Oasis with the high cliffs. The lift hill starts out at the bottom of the quarry and assends over a portion of cliff jutting out from the main face. The first drop is steep and at the top of the second hill you go whizzing down this large descending single helix and back up over the cliff face. At the top you go around this really huge circular track two times. At this point, the train is going pretty slow and you're like what's going on. It's like you're on one of those kiddy rides you used to take your kids on when they were 5 & 6 years old. After a good 45 secs or so, you're finally thinking, "come on now lets get going". The train finally picks up speed, drops and banks and goes into the face of the cliff, a real life tunnel for about 3-4 secs. Now I'm thinking OK, this part should make up for that dumb circular thing. You come flying out of the turnnel, do a few banks and small drops and then hit the brakes.

When I got off the Rattler I was so disappointed. :angry:

Ultra's tutorial is an excellent example of buillding terrain coasters. However, if you're still trying to perfect you're coaster skills, I would suggest to first build in an open-flat area where you can see all the speed changes and experiment with the different track elements. Once you perfect it there, then take the next step and follow Ultra great ideas.

#9 coastercrew

coastercrew

    Coaster Designer

  • Members
  • PipPipPipPip
  • 205 posts
  • Location:Cedar Park, TX
  • Interests:Skiing, swimming, soccer, hiking, biking.

Posted 08 February 2006 - 08:20 PM

Here's an Element Cross Reference Report for helping to learn the various elements to a coaster. :thumbs:

#10 Emergo

Emergo

    April05 VP/05+06 Rd Rally Champ/Winner Cell Contest 2006

  • Senior Staff
  • PipPipPipPipPipPipPipPip
  • 3361 posts
  • Location:The Netherlands, Europe


Users Awards

Posted 09 February 2006 - 12:11 AM

^ I remember having known this site before, but somehow never saw it again. Very handy and informative one.
Thanks :D (made a link to it now) :thumbs:


0 user(s) are reading this topic

0 members, 0 guests, 0 anonymous users